


Web Design Timeline – How Long Should A Project Take?

How long does it take you to deliver a client’s website from start to finish? Three weeks? Three months? And, what if there was a way to cut that time in half? 

The process for designing and developing a website depends on the size of the project, and the work that will go into it. One of the first questions that clients ask is “how long is this going to take?”

I always hated answering this question, especially when I was starting out as a freelancer. 

I’d over-promise on what I could deliver, and how quickly I could do it, then find myself slamming coffees to hit the next deadline.

However, once you build enough websites you start to get an idea of just how long it takes. From the first email with a client, to getting paid, doing revisions, and delivering the final product, there are a lot of parts to think about.

This article will guide you through everything you need to know about the web design timeline, as well as show you how to massively reduce the time you spend on a project.

So, without further ado – let’s dive right in. ?‍♂️

How Long Does It Normally Take to Design a Website?

A good website requires extensive planning and research. Starting with gathering information about the client and figuring out the purpose of the website, to building wireframes and writing content – which needs to be updated on a regular basis.

Every website development project is different, with milestones set by the designers and developers before it begins. In some cases, if the requirements are fairly straightforward, the design and development process may take anywhere between 2-4 weeks. 

However, if it’s a complicated project that requires extensive client feedback and back-and-forth, it may run on for several months. Understanding the timeline from start to finish is important before you sign up for a project. 

The Web Design Timeline From Start to Finish

There are several key sections that you must consider when creating the web design timeline. Let’s talk about them.

1. Initial Contact with the Client

client meeting to discuss the web design timeline

This step is vital, as it’s your first meeting with the client to discuss the project. As a designer, this meeting plays an important role because it allows you to understand what the client really demands from you. You can discuss the requirements of the project and find out what kind of vision the client has in mind.

If you have any questions, this is the time to ask. You don’t want to create comprehensive wireframes or mockups only to find that the client had something completely different in their head. 

2. Research and Planning – What’s the Website For?

planning a website

The research and planning stage is the next step in the web design timeline. At this stage, you will conduct comprehensive research about other competitors, discuss any specific requirements or features with the client, and then set milestones for the entire project.

A detailed sitemap is created at this stage and sent for approval to the client, and as a designer you’ll have to figure out what tools or technologies to use throughout the project. This is also known as the project discovery phase. Key deliverables are decided at this point, with both technical and creative briefs written and sent for approval to the client.

Approval from the client is necessary before proceeding further, but make sure you’re utilizing your experience to steer the project in the right direction.

They’re paying you, remember? It’s not the other way around.

3. Wireframing – The Initial Mockups

Instead of creating a detailed layout of the website right from the get-go, designers start by creating wireframes. A wireframe is essentially a page layout that showcases all the major elements, and gives some brief notes about how it should look. The primary objective of wireframing is to provide a visual outlook to the client about how the pages are going to look once they have been designed.

Wireframing is essential at the start of the project lifecycle because it helps bridge the gap between the work you will deliver and the client’s expectations. If the client doesn’t like the layout, they can provide their suggestions, and the designers can amend their original designs.

Client suggestions, messaging, and back-and-forths are some of the most time consuming parts of a project. This is where having an intuitive management system in place makes all the difference – which we’ll talk more about later.

Practically, wireframes help ensure that the website’s functionality and content is appropriately positioned and aligned with the client’s business, as well as providing a great experience for the end user.

Also, without an agreement between you and your client on a wireframe or prototype of the website gives your client the option to start sending you content and changing layouts during the next steps of the project. This wastes time, loses you money and can really break the relationship between you and your clients.  

Wanna learn how to build website prototypes in minutes that are setup to gather content? Check out our post here: “The Right Way To Gather Content From Your Clients”.

4. Content Creation 

writing content on a laptop

The next step involves content creation and marketing strategy. The success of any website can be measured by the quality of its content. This is what attracts users and ensures that they keep checking the website again and again.

Content covers a wide variety of things:

  • Blog posts and content strategy
  • Keyword research
  • Copywriting and headlines
  • Brand voice, about pages, and team introductions
  • Imagery and media

It’s also essential for SEO purposes. Using the right keywords will boost visibility and make your website show up in search results. It’s always a good idea to work on the content before the design stage gets underway. Creating a link between the content and the design is important, so if you have the content ready, the design stage automatically gets easier.

The timeline for this usually varies depending upon the size of the website. How many pages does the website have? More importantly, will your agency be handling the content, or will the content be provided by the client for all the pages? Are you outsourcing any of the work?

Regardless, it’s important that you follow up with the client regularly. Poor communication will result in confusion and delays, which is only going to slow things down.

5. Delivering the Landing Page Designs

laptop with landing page

A landing page, also known as a lead capture page, is essentially any page that a visitor lands on when they open your website through a link. The purpose of a landing page is to “capture a lead” by offering an incentive, such as a lead magnet, or to provide a great deal of value to somebody and provide any necessary information they need to become a customer. 

At this stage, the designers will create accurate mockups for the landing pages, as well as any other internal pages that need to be done. Then, the client will be asked to review the designs and give their feedback. Once they do, you can incorporate this feedback and tweak the landing page designs until everyone is satisfied.

6. Development – The Crux of The  Web Design Process

programming a website

In most cases, the design and development stage take up the longest time. Once the client has given their approval over the initial designs and wireframes, the agency will work with developers to bring these designs to life. Videos, slideshows, and other pieces of content can be created, and the website’s code will start taking shape.

This entire process involves coding, validation, and extensive testing to make sure everything is working. Nowadays, creating a responsive website is an absolute necessity, so device testing is carried out to check whether the website runs well on every type of device from tablets and phones, to small laptops and 4k monitors.

To keep the client updated on the web design process, a demo installation in a staging environment is usually offered. The client gets to view the pages and interact with them as they’re built, and if they have any feedback you can incorporate it while the pages are being developed.

7. Optimization – Fine-Tuning the Website

search engine optimization overview

Next up, we have optimization. The goal of search engine optimization is to ensure that the website has been designed to rank high in search results, attract organic visitors, and gain authority over time. This means checking to see if relevant keywords from the niche have been used in headings and titles, creating shareable content, and ensuring the site loads quickly. 

If you’re not to start when it comes to optimization, we’ve written an in-depth guide for web developers on SEO and content marketing.

8. Beta Testing and Review

testing a website

After the optimization stage, a comprehensive beta test is run to ensure that all of the website’s features are working as intended. This can take anywhere from two to six weeks, with rigorous testing to check everything from back end server performance and buttons, to social links, spelling errors, and page speed.

More importantly, the website is also tested on multiple platforms and devices to check whether the pages load up properly on different screen sizes. Further optimization might be carried out if that’s not the case. 

You want to avoid having to make changes after the project has been finished, so doing as much as you can during the testing phase is vital to save both time and money down the line.

9. The Launch

abstract laptop prototype

And finally, after you receive approval from the client you can have a deep breath and take the website live. Depending upon the requirements of the client, the launch process could be as simple as hitting a switch, or it may require detailed interaction with the hosting company beforehand.

Keep in mind that developers need to be ready for after-launch problems. Some of these include:

  • Difficulties in website getting crawled
  • Poor security (no SSL certificate)
  • Slower load speeds
  • Plagiarized content
  • Broken images or links

You will have to fix these errors as they are detected, and providing great after-project care can make a huge difference on how a client rates your work.

Why Do Websites Take So Long to Build?

In some cases, websites can take several months to build properly.

One of the major points of friction here is the amount of time that it takes to go back and forth between clients. 

When you work on a feature or create a mockup, you have to present it to the client. Then, it takes a few days before they are able to check it and give their feedback, provided they even know which exact part of the site you’re talking about. 

All of this running about significantly increases the time it takes to create and launch the website. 

That’s where Atarim comes in. Atarim is an all-in-one platform that web developers can use to get comprehensive feedback on their website. Once the plugin is installed, clients can view changes and give their comments, without ever having to leave their own site and all feedback is neatly organized into an Agency Dashboard for every website that you add. 

testimonial for Atarim

Instead of having to use tools like Basecamp, Google Docs, or Sheets, you can manage client communications through a centralized platform. 

The visual communication aspect of Atarim gets rid of unnecessary friction, with clients able to highlight and leave comments on different aspects of the website’s design. You’ll get notified via email with an automated screenshot of the problem, removing the need for any back-and-forth. 

You also don’t have to worry about creating lengthy tutorial videos. Just leave comments explaining different features, and the client will be able to view them through the platform at their own leisure. 

Simply put, web development takes so long because of inefficiency. Once you fix this, you’ll be amazed at how quickly you can deliver a project.

The Bottom Line – It’s Time to Streamline Your Web Development Processes

When was the last time your agency reviewed its web development processes and timelines? Better yet, are you even measuring turnaround times and keeping a pulse on what the average turnaround time has been for the last 10 clients you’ve taken on? 

Imagine being able to take on double the number of clients, live a less stressful life & spend less time juggling expectations with all of your clients all at once than before…

That’s where Atarim comes in.

Interested in seeing exactly how we can help you shorten the web development process by 80%, how about a quick 15 minute demo with our Agency Success Expert? You can book a demo here

5 Unique Things You Can Only Do With Atarim

Atarim (previously WP Feedback) started off as a simple visual feedback tool for web designers. However, since its inception in 2019, it has undergone many changes to become what it is today.

From its humble beginnings as a basic WordPress plugin, Atarim quickly grew into a wildly popular solution for web development agencies looking to transform the way they work.

As the plugin became more and more popular, the company began to introduce an array of new features to meet user demand and requests. After 18 months as a plugin, we eventually pivoted to a full-scale SaaS model and continue to build upon the only solution dedicated to web design agency project management & communication.

From Frustration to Innovation – How Atarim Was Created

When we launched, I was running a web design agency of my own & decided to build Atarim after years of stressing out to maintain multiple communication channels with clients, such as Facebook, emails, texts, Skype, LinkedIn, and the most notorious one of all – voice messages. ?

By streamlining the way web design and development agencies manage client communication, Atarim grew rapidly in a short period of time to satisfy the demands of more than 5,000 agencies and freelancers.

Screenshot showing Atarim's dashboard

The most revolutionary part of Atarim is its centralized hub, allowing you to easily manage your clients without having to log in to each website. This is known as the Agency Dashboard, and looks like this:

Over the next year and a half, the team added more than 150 features to Atarim. And all that’s required is a plugin installed on each client website. This makes it easy for clients to provide content, check and approve designs, and request additional support.

The plugin also allows for seamless communication, automated screenshots, and passing on relevant information such as browser and screen size to the agency or freelancer via the agency dashboard.

Atarim is primarily designed for freelance web developers and agencies working with multiple clients. Here are some unique Atarim features that you should know about.

1. Manage All Your Websites From A Single, Central Dashboard

Screenshot showing Atarim's dashboard

Whenever you log into your dashboard, you will see a comprehensive overview of projects, clients, and tasks. You can also assign projects and tasks into different teams, all through a simple, centralized hub. This way, you get all the information you need at a glance right away, allowing you to prioritize tasks and make important decisions on what needs to be done.

2. Get A Deeper Understanding of Your Clients’ Requirements

atarim-task-center

The task center is an excellent feature in Atarim that shows client requests for each website. Whenever a request gets created, Atarim will also attach an automated screenshot, showing you exactly what your client is referring to.

At a glance, you can view comments and check any updates posted on each task. As soon as the plugin is installed, it creates a task center in your Agency Dashboard. You can operate from the dashboard, and the client will see changes on their task center in real-time. This ensures that you and your client both remain on the same page and removes the need for painful back-and-forths where your client is trying to explain which button they want to change.

3. Track Tasks That Are Actually Associated With Websites

screenshot showing atarim's kanban boards

Kanban boards aren’t unique, but Atarim simplifies client communication by providing real-time updates with email notifications as each board is updated. Clients can also create their own to-do lists for your team through their website, making communication seamless.

This, combined with the Team Activity feed, makes it easy for you to track work done by team members. There are several additional features that make project management extremely simple in Atarim.

Activity Updates

You can view the path taken by each task, including assignees and responsible parties, so you know which member of the team is working on what.

Time Estimates

Managers can create time estimates based on their own experience or understanding of how long a task is supposed to take.

Discrete Task Management

Communications and tasks are separated based on clients, so the lines never get blurry from one client to another. It’s also highly scalable.

4. Collect Feedback & Communicate Visually

Designing mockups and logos is an essential part of running an agency. Usually, there’s a lot of back and forth involved in getting approvals from a client about what works and what needs to be removed. The Visual Feedback Tool in Atarim allows clients to write specific comments overlaid on images, so you know exactly what your client wants.

The visual feedback feature is also installed within the client’s interface plugin, so they never have to leave their website. After a revision is requested, you can upload a new version from your own dashboard and review any further comments.

5. Seamless Two-Way Communication Right On Your Clients’ Websites

Screenshot showing comment exchange between clients
No other tool makes communication with clients as easy as Atarim does.

Instead of having to sift through extensive email chains, Atarim makes things simple. Clients can define the urgency of a task and communicate through a centralized platform. They can even create tasks on the client-side plugin, so you know exactly what you have to do, or who to assign it to.

This also presents a unique opportunity: you can guide your clients about how to make adjustments or changes to their WordPress website. Instead of having to create long tutorial videos, you can simply leave notes that your client can see.

These tiny visual cues can go a long way in preventing those emergency situations where a client does something wrong and rushes to you for help.

Bonus Hidden Atarim Use Cases Our Users Love

People use Atarim in different ways based on their own needs. Here are 5 creative ways in which agencies and freelancers use Atarim.

Create color-coded stickers on a website to easily direct clients

adding color coded comments to atarim

Want to divert your user’s attention to a specific area on your website? You can create engaging, attention-grabbing stickers to point your users to a particular area on your website. Colors can represent urgency or progress, whichever one best suits your needs.

Use compact mode + {display:none} to support logged in users within your website/shop/LMS, like an interactive FAQ

Interactive FAQs and support can help you boost sales by a considerable margin. By using the compact mode, you’re better able to support your users. In case they have a question, you can easily provide an answer, nudging them closer to conversion.

Create stickers in query string specific locations to train clients

You can use this CSS to stop comments for the sticker and give clients detailed guidance about different features on their website.

Use guest mode +: before for instructions + {display:none} to collect questions and leads from visitors

Adding this class makes it easy to hide elements without having to recreate or delete them. You can use this to get relevant questions from visitors and provide more value in the future.

Add ?wpf_login=1 to any screen to load a login popup

You can also add the Atarim login parameter to any URL on your website to automatically load a login prompt popup – as shown above.

Summary – People are enjoying Atarim & You Can Too

We’re pleased that you made it to the end of this post & hope you’ve found it useful in objectively evaluating what sets Atarim apart from generic project management software for web design and development businesses.

If you haven’t already taken it for a spin on one of your sites, now’s never been a better time to get started. We’ve really only just begun to scratch the surface – there really is a lot more to love about Atarim. But you don’t have to take our word for it – here’s what our users are saying:

atarim testimonials from clients

Ready to see how Atarim can change your business? Get started today…

6 Easy Fixes for the WordPress White Screen of Death

WordPress is used by over 64 million websites. It is one of the most popular content management systems on the web, famous for its ease of use, convenience, and scalability. But, it’s definitely not without its problems, and if there is one problem that developers dread, it is the WordPress white screen of death.

The white screen of death locks administrators out of the dashboard, and visitors are also greeted with a plain white screen. And, while it might not seem like it the first time you experience the white screen of death, it’s easily salvageable.

In this article, we’ll explain what the WordPress white screen of death is, the causes behind it, and most importantly, different methods to help you fix this dreaded error.

What Is the WordPress White Screen of Death?

Windows users already know about the blue screen of death, and it’s probably where this one got its name from. The white screen of death simply indicates that there’s an error on your site.

On some browsers, like Google Chrome, you might see an error saying, “This page isn’t working and is unable to handle the request.” On other browsers, like Firefox, you’ll just see a white screen. The worst part is that there’s no error on the site to indicate what’s wrong.

In most cases, the white screen of death is caused due to any of the following factors:

  • Memory limit
  • An error or conflict in a WordPress plugin
  • A faulty code or error in your theme
  • A database error

In most cases, it’s probably an issue with your plugin or your theme. Thankfully, it’s also easy to fix. Here are several methods that you can try to fix the issue.

6 Simple Ways to Fix the WordPress Screen of Death

As soon as you encounter the white screen of death, you need to work on fixing it. Run through each one of these in turn, and if you still can’t figure out what’s wrong after trying everything, we’ve included a section at the bottom to help you out.

1. Use Fatal Error Recovery Mode

Fatal Error Recovery Mode was introduced back in 2019 with WordPress 5.2. This feature is a godsend for administrators, as it allows them to access the admin dashboard even if the site went down to a fatal error like the white screen of death. With FERM, you will have the option of logging into your site to figure out what’s wrong.

All you have to do is to log into your admin email inbox. You’ll find an email with “Recovery Mode” as the subject, and details inside on how to log in. Here’s how the admin backend looks while you are in Recovery mode:

recovery mode dashboard to fix the wordpress white screen of death

Once you are in, you can individually disable each plugin and see if that fixes the problem. The dashboard also highlights themes and plugins that were paused due to the fatal error. You can then individually deactivate each plugin to isolate the malfunctioning one.

If the error is caused by a theme, you can change that or fix the problem before you activate it again. Unless you have technical knowledge, it might be a wise idea to hire a developer to help you find the culprit.

But, if the recovery mode is not an option, you will have to find and fix the error manually.

2. Disabling Plugins Manually

The wp-content folder is the most important folder on your website and is found in the root directory. Unless you have made some major changes to the file structure, the folder is created by default and named wp-content. You need a File Transfer Protocol client to gain access to the file directory for your website.

Once you log into your FTP server, just find your website’s directory and open wp-content. Here, you need to look for the plugins folder. You will also see two other directories in most cases: uploads and themes. Some hosts, or cloud server management solutions like RunCloud offer built-in file management to make this even easier to do without having to access your server via FTP or SFTP:

RunCloud File Manager

To disable all the plugins, just rename the file to anything else, like “plugins_paused” or something similar. This will automatically pause all plugins. Now, try visiting your website. If it starts loading, you will know that the problem lies with one of your plugins.

To find the faulty plugin, you have to rename each one in the plugins folder and check individually until you isolate the problem.

Note: If you are in FERM, it will automatically pause any code that’s causing an issue with your site. It automatically diagnoses the problem and identifies the faulty plugin for you. The plugin must be reactivated manually by the administrator.

3. Extend WordPress Memory Limit

You are likely to run into this problem if your WordPress website is growing rapidly. Memory issues arise when there simply isn’t enough memory for the amount of traffic your website is receiving. To manually increase the memory limit, you need to tinker with a bit of code.

In the WordPress content folder, you need to first find a file named wp-config.php. You’ll see something like this:

Now, all you have to do is to add a line of code. If you already see the following code, just edit it to increase the number:

define (‘WP_MEMORY_LIMIT,’ ‘64M’);

This code sets the limit to “64M.” If that’s not enough, you can increase it to 96M. Try checking your website afterwards. If it’s a memory limit issue, it should be resolved by now.

4. Deactivate Your WP Theme

If you have already tested the plugins, the issue might be related to your WP theme. If you recently updated a theme or switched to a new one, then it’s probably an issue with the theme. Ideally, you should test the theme or even a minor update in a staging environment before you take it live.

To disable the theme, you need to look for the themes folder in wp-content. Just like with the plugins, you need to find the theme you recently installed, rename it to something similar, and then it’ll be disabled.

You can then check your website to see if this fixes the problem. When the original theme is unavailable, WordPress automatically switches to a default theme like Twenty Twenty-One. If the issue is caused by a faulty theme, have a developer look at the code, or find a quality theme and thoroughly vet its code before taking it live.

Note: If you can access the dashboard, go to Themes and switch to a default theme on WordPress before checking your website.

5. Fixing Errors in Core WordPress Files

Editing core WordPress files is always risky, but sometimes necessary. If you were making changes to any core WP file and encountered this error soon after, it’s probably best to retrace your steps. Sometimes, an accidental mistype is all it takes to break your website!

Ideally, you can resolve the problem by uploading an unedited version of the file you were just editing. For instance, if you were meddling with a core file, you can download a fresh copy of the CMS from the official WordPress website.

Just unzip the files on your computer, then look for the file on your server that you recently edited. Delete it and replace it with the fresh copy you just downloaded.

Check your website and see if that fixes the problem.

6. Enable Debugging Mode

The debugging mode, or wp_debug, is designed to display any specific errors that show on your website. To enable debugging mode, open your wp_config file and find the wp_debug code. Here’s how it looks:

WP Config Debug Rule

By default, it’s set to false, but you have to change the value to true, as shown above. Once you save the file, you will automatically begin to see errors on your website. It might be difficult to decipher the errors at first, but you will get some important insights.

For instance, you might get the name of a plugin or the file that’s causing an issue, such as plugin.php. It’s not going to fix the problem for you, but it will give you some information into what’s causing the issue.

Note: Make sure you disable wp_debug by changing the value to “false” when you are done with the troubleshooting.

What if the Problem Still Persists?

While the fixes given above will fix the white screen of death in more than 99% of cases, there are always other possibilities that may require you to reach out to your web hosting company or contact a technical lead. For instance, a malware infection on your site or a corrupted drive could result in the white screen of death.

Server-side issues on the part of your web host could also lead to this problem. It’s best to reach out to your web hosting support and see what they have to say before you call in a technical expert. The best way to circumvent this problem is to run regular backups on your site.

In case none of these fixes work, you will always have the option of reverting back to a functioning version of your website – provided you’ve backed up your WordPress files.

Summary – The WordPress White Screen Shouldn’t Make You Panic

Hopefully, after reading this article, you’ve realized that the WordPress screen of death really isn’t anything to be afraid of. There are many ways for you to fix it, and if none of those work you can always contact technical support to help out.

It’s always stressful when things go wrong, especially when it comes to your clients’ websites, which is why we built Atarim to make handling multiple web design projects a breeze.

By streamlining client communication and using a dashboard that allows you to manage all of your websites in one place, it allows you to focus more on the work you want to do, and spend less time on the tedious work you don’t.

Check out Atarim today and see how you can deliver web development projects up to 80% faster.

How To Back Up Your WordPress Website (Step-by-Step)

Making changes to your website, or updating it, can potentially involve a great deal of danger. You might possibly run into issues that could knock your website out of action – or even wipe it out completely if the update fails.

Yet, even with all of the risks associated with maintaing an online presence, 96% of businesses do not back up their websites.

Fortunately, preventing your website from disaster can be done by setting up automated WordPress backups, which can take as little as five minutes.

In this post, you’ll learn three different ways to easily backup your WordPress website, at varying levels of complexity, so that you can avoid a catastrophic disaster from ever happening to you.

Why Backing Up Your Website Is Important

Backing up your website can save you a huge amount of stress should things go wrong.

However, what most people fail to realize is that WordPress backups aren’t just there to protect you from your own clumsiness or mistakes. Your site can get attacked by hackers, or something as simple as a new WordPress update can cause things to break beyond repair – you just never know.

The risk is very real, with 2 out of 3 midsize companies affected by Ransomware in the past 18 months.

Unfortunately, 60% of businesses that suffer a data loss event will close down within six months.

Backing up your site is like getting insurance for your car. You may never need to use it, but it’s nice to have a safety net in place just in case. 

How Often Should You Back Up Your WordPress Site?

You should tailor your backup schedule depending on what type of site you run.

It could be after you’ve made a major change, before an update, or just set it on a regular schedule and forget about it. A new site publishing multiple blog posts every hour will need to back up much more often than a personal portfolio site that only updates every week or two.

And in the case of an e-commerce site, you’ll want to use real-time backups which makes copies of data automatically any time any changes are made. That way, you can ensure that no customer order data is lost should something happen to the site.

How To Back Up Your WordPress Site

The easiest way to backup your site is to install a plugin and let it do the work for you.

For those of you who don’t want to rely on plugins due to security risks or the effects they can have on website performance, we’ll also cover other paid (and more reliable methods later). 

Method 1 – Backing Up Your WordPress Website for Free

This method takes as little as just a few minutes and requires no experience with backups.

Step 1: Install The UpdraftPlus WordPress Backup Plugin

A simple search for “backup” in the WordPress plugin library gives us a huge number of results.

backup plugins WordPress

Each plugin offers something different, so spend time experimenting with them to figure out which one is right for you. In this section, we’ll be focusing on the most popular plugin, UpdraftPlus. It’s incredibly easy to install and set up, and is great for anyone looking to install a fast backup solution in a few minutes.

Go ahead and find UpdraftPlus in the plugin library and click ‘Install now‘, and then click the “Activate now” button that pops up afterwards.

Once done, you’ll need to set up the plugin – just following their step-by-step tutorial will do the trick.

Step 2: Configure Your UpdraftPlus Backup Settings

Press the ‘Backup Now’ button in the ‘Backup/Restore’ section of the plugin, and UpdraftPlus will automatically backup your site.

configuring the UpdraftPlus backup plugin for WordPress

You can also set up a recurring schedule by heading over to the “Settings” tab, selecting the dropdown that says ‘Manual’ and choosing whatever time period you want.

UpdraftPlus plugin settings in WordPress

If you want to have the backups saved in a remote location, you can invest in their premium version, which costs $84 a year. Once you’ve done this, don’t forget to save your settings and you’re good to go. It really is that simple to back up your WordPress files with a plugin.

Method 2 – Use A Professional WordPress Backup Solution

If you’re looking for something more comprehensive, you’ll find free plugins limited in what they offer.

You may need to manage multiple websites, add team members, and update plugins across sites with one click. For these cases, we’ve found BlogVault to be the best option.

Step 1: Create An Account on BlogVault And Add Your Website

The first thing you need to do is to set up your account and add your first website. Head over to BlogVault and get started by clicking on the ‘Start Free Trial‘ button.

BlogVault backup plugin homepage

You’ll be guided through the onboarding process and, after creating an account, you’ll be asked to add a website. There are three ways to set up BlogVault on your site:

  1. Automatic installation using your WordPress login credentials.
  2. Manually download Blogvault and install it via the WP admin panel.
  3. Install the BlogVault plugin and run the automated setup.
how to install BlogVault on your WordPress site

For this tutorial, we’ll be using the ‘Auto Installation‘ option.

Step 2: Initiate Sync And Set Up Your Backup

After you’ve clicked ‘Continue‘ and logged in using your WordPress details, a button will appear prompting you to start syncing your website.

It should only take a few minutes to get everything synced up, and once it’s finished you should be able to see an overview of your website in the BlogVault dashboard.

BlogVault dashboard

Clicking ‘BACKUP’ in the top panel will take you to the backup dashboard, which is where you’ll be able to customize your backups or restore files.

managing backups in BlogVault

To get the most out of BlogVault, such as enabling real-time updates, you’ll need their paid plan, but for busy developers and agencies the paid version more than makes up for its cost.

Plus, since BlogVault has a one-click setup, managing multiple sites takes less time than using a plugin, where you have to manually set it up for every website you manage.

Method 3 – Server-Level Backups

Most websites are hosted through a company like HostGator, Kinsta, SiteGround, WP Engine, or Cloudways. There’s no end to the list, so it’s going to be impossible for us to cover all of them in this article. However, backing up your site isn’t going to be too different regardless of which hosting platform you use.

In our example, we’ll be using RunCloud, a fantastic all-in-one server management platform that makes creating backups a breeze.

RunCloud homepage

The benefit of using a service like RunCloud or Cloudways to back up your website is that everything is done on the server level, avoiding any possibility of slowing down your website using a plugin – which often has size limitations and isn’t suitable for bigger or more complex websites.

Step 1: Log in to RunCloud (Or Your Hosting Provider Of Choice)

Head over to RunCloud’s login page and sign into your account.

RunCloud signup page

Step 2: Create Your Backups

Navigate to the ‘Backup’ tab in the dashboard, and follow the instructions to start backing up your website.

backing up the first website with RunCloud

Clicking ‘Back up your first site’ will take you to a configuration page.

If you’re used to basic WordPress plugins, you’ll find much more customization options available to you, such as:

  • Frequency of backups
  • How long you want to keep files
  • Notification settings (RunCloud notifies you via Slack, Telegram, or Email if there’s a problem with your backup)
  • What time you want the backup to start
how to configure backups in RunCloud

Depending on your hosting provider, you may need to purchase additional storage space to save your backups. For instance, Cloudways will charge you if you exceed your plan’s bandwidth limit, while RunCloud gives you 50GB of free storage if you are one of their paid plans. 

When you’re finished configuring your backup instance, hit the ‘Create’ button and you’re good to go!

Summary – Protecting Your Website is Easier Than You Think

If you haven’t already implemented one of these backup solutions, now is the time to do it.

Why? Well, because (speaking from experience here) having a proper backup & disaster recovery system in place is essential if you manage and host websites for your clients on website care plans. 

Our go-to backup solution is using a combination of multiple solutions for redundancy – such as RunCloud’s built-in backups, and a paid solution like BlogVault, that can even run real-time backups, which are essential for absolutely critical sites such as eCommerce websites where any loss of information or data has serious business effects. 

If you’re looking for additional WordPress-related tips, you can check these resources below:

If you have any questions or need anything in general, you can always reach us on support@atarim.io where we are always happy to help!

How To Customize the WordPress Login Page (Easy & Advanced Methods)

WordPress has changed the face of web design completely, and yet the default login page over at wp-admin is still bland and uninspiring.

When designing a website, if you’re anything like me then you want to provide as much value as you can for your client. You spend hours tweaking margins and headers, making sure there’s enough white space blended in with the amazing color scheme, and you can’t wait to show it off to them.

That is, until they try to log in to the site and get greeted by an off-white box with a couple of blank fields and buttons in the middle.

Having a custom login page for your WordPress site might not seem like a big deal, but when your clients are used to seeing the same thing over and over again, adding something in like that can make a big difference to their first impression of your work.

In this article you’ll learn how to build a custom WordPress login page in two different ways, depending on how hands-on you want to get:

  1. Using a plugin
  2. Manually editing CSS and adding stylesheets

A Step-by-Step Guide on Creating a Custom WordPress login page

We’ve made this guide as simple and easy to follow as possible, and if you don’t like the look of one method don’t hesitate to try something else.

Customizing the WordPress login page with a plugin

If you’re a web developer then you’ll probably want more control over exactly how this is implemented, so you’ll likely want to skip right ahead to method #2. But, for those of you who want to save time, experiment, and get up and running right away, then using a plugin is the best option.

There are a lot of plugins out there, but we went with the top search result: “Custom Login Page Customizer” by LoginPress.

Step 1: Install and activate the plugin

As with any other plugin on WordPress, go ahead and search for it or click this link to go directly to the download page, press install, and then activate the plugin.

Once it’s activated, hover over the LoginPress tab on the left hand side of your dashboard and click on customize.

Note: You’ll be prompted to share your data and email with the company, but if you look closely you’ll see a small “skip this step” link underneath.

Once you get used to the layout, changing particular aspects of the login page become simple. You can customize the background, logo, colors, text, and a lot more. I’d recommend spending some time playing around with it and seeing what you can come up with.

I’m not much of a designer myself, but after around 15 minutes of tweaking I ended up with something like this:

Most of this can be done through the default menus. However, if you want to change the position of the form like I’ve done you’ll need to add some additional CSS. Alternatively, you can invest in the pro version and get access to their premium templates – but where’s the fun in that.

Step 3: Adding your own CSS to the plugin

If you’re already familiar with CSS/JS then you won’t need too much explanation of what to do. Simply head over to the “Custom CSS/JS” tab on the plugin and get to work.

Here are some handy CSS selectors for the wp-login page:

body.login
body.login div#login
body.login div#login h1
body.login div#login h1 a
body.login div#login form#loginform
body.login div#login form#loginform p
body.login div#login form#loginform p label
body.login div#login form#loginform input
body.login div#login form#loginform input#user_login
body.login div#login form#loginform input#user_pass
body.login div#login form#loginform p.forgetmenot
body.login div#login form#loginform p.forgetmenot input#rememberme
body.login div#login form#loginform p.submit
body.login div#login form#loginform p.submit input#wp-submit
body.login div#login p#nav
body.login div#login p#nav a
body.login div#login p#backtoblog
body.login div#login p#backtoblog a

These selectors allow you to customize everything from the whole form using body.login div#login (which is what I did on my page), to the submission button, forgot password link, and colors of each element.

However, if you’re not too familiar with CSS – don’t worry. If you just want to change the placement of the entire form, simply copy and paste the following code into the “Custom CSS” box shown in the picture below:

body.login div#login {
  margin-top: 10%;
  margin-bottom: 50%;
  margin-right: 20%;
  margin-left: 60%;
}

All this does is create a margin – basically blank space – between each edge of the form and the corresponding side of the screen. Change these numbers around to your heart’s content until it ends up exactly where you want it to be.

Similarly, if there’s a specific thing you want to change just replace “body.login div#login” with a difference selector from above, and then add your own CSS to it. I highly recommend using W3Schools if you ever need more information or want to learn CSS.

Just remember that it won’t update the visual editor automatically. You’ll need to visit your live wp-login page or publish and refresh to see any changes.

Step 4: Don’t forget to publish your work

This goes without saying but it’s easy to forget. Once you’re finished, make sure you publish your beautiful new WordPress login page so you don’t lose it forever.

Customizing Your WordPress Login Page Using CSS and Custom Stylesheets

This is certainly the most complex method on the list, but if you’re familiar with CSS, PHP, and editing theme functions in WordPress it shouldn’t be much of a problem.

If you only need to make one or two changes, you can simply add a few lines into your functions.php file in the WP theme editor.

//This will remove the lost password text
function my_login_page_remove_password_text() { ?>
    <style type="text/css">
        body.login div#login p#nav a {
          display: none;
        }
    </style>
<?php }
//This loads the function above on the login page
add_action( 'login_enqueue_scripts', 'my_login_page_remove_password_text' );

Copy these into the functions.php file at the top:

And as we can see the text has been removed from the WordPress login page:

You can customize this however you want using different selectors that we mentioned above, but it can get messy fast.

If you need to make a lot of changes to your login page then it’s not ideal to keep creating new functions one at a time. This is where stylesheets come in handy.

Using login_enqueue_scripts to load a custom stylesheet

The best way to edit your WordPress login page is to build your own CSS/JS stylesheet and add a function to your theme to load it in.

Firstly, you need to add a function into your theme. To do that, copy and paste the following code into functions.php:

function my_login_stylesheet() {
    wp_enqueue_style( 'custom-login', get_stylesheet_directory_uri() . '/style-login.css' );
    wp_enqueue_script( 'custom-login', get_stylesheet_directory_uri() . '/style-login.js' );
}
add_action( 'login_enqueue_scripts', 'my_login_stylesheet' );

This will then allow you to make changes to a stylesheet and have them take effect on the WordPress login page.

If you won’t be adding any JS into the page then you can remove the 3rd line from this block of code.

Once that’s done, the next thing you need to do is write up a CSS stylesheet to use for the login page named “style-login.css”, or whatever you choose to use in the function above.

Now, we’re not going to fill this whole article with the complete guide to CSS. If you’re reading this section then we assume you’re already familiar with how to write it. If you’re not, there are plenty of resources online to help you learn, or you can utilize one of the plugins available to customize the login page.

Note: The style-login.css file should be placed in the theme’s directory alongside the functions.php file with the theme’s style.css (in order for it to be picked up when enqueued).

Summary – Customize Your Login Pages To Suit Your Brand

Hopefully, after reading this guide, you’ve learnt how to customize your WordPress login page and create something worthy of your skills as a developer.

Whether you’re manually coding it with CSS and JS or using a simple plugin, you can guarantee your clients will appreciate your attention to detail as opposed to seeing the the WordPress brand which they may be unfamiliar with.

If you’re looking for ways to take your web development to the next level and eliminate almost all of the day-to-day stress of working with a client, take a look at Atarim – our agency management platform, and start delivering projects 8x faster.

Brand Community – How You Can Use It & Refreshing Our Approach

In celebration of hitting the 2,000-member milestone in our own community – we wanted to spend some time talking about brand community, what it is & how you can use it to grow your business, as well as what the future plans are for the Atarim Community.

Here’s what we’ll cover:

Our Community Largely Leads Product Development

As an early-stage startup – the closer you can get to your users, the better.

To put it simply, we’re now working with every single member of our community to build the best possible solution out there and they know that doesn’t happen overnight. But if we just shut ourselves off from the people actually using our product and just start working on what we think makes the most sense.

And even back when we first started, we launched as a very simple WordPress plugin that performed a particular task. Our beta all took place in a community, with our users so we didn’t just get feedback emailed in, people were able to leave feedback collectively (as a group) which led to us iterating on the product…

Community Culture – Creating A Sense of Belonging

As a company, our vision for Atarim is a path that no other business has really taken. Our vision is to redefine the way agencies work primarily through how they communicate and manage their workload. This isn’t as simple as being a new helpdesk solution as the way the entire platform operates is in itself a complete rethink of how things should have been in the first place.

And, of course, creating a cultural shift in the way people work away from something that’s been tradition for over a decade or two like this is quite a feat.

This is another big reason the community plays such an incredibly important role for us – instead of trying to educate through one-way channels, we’ve brought everybody into a single place together to collectively learn and share their experiences with our platform and how they’re running their businesses. For a SaaS business that relies on our customers’ businesses thriving and truly benefiting from our software (i.e. as opposed to software that falls into categories like accounting where the bar is notoriously lower because those companies know their users won’t be switching and need their software to operate regardless of how bad support & UX is), being this close to our users and having the ability to be present for them when they have questions about how best to approach something, feature suggestions and more is invaluable.

How Our Community Fueled Our Growth

Beyond that – community – which as we all know is actually a super broad term that’s often used to describe an audience as well, has been at the center of what has led to the majority of our growth over the last (coming up on) 2 years. We launched our product in the WordPress community initially where it eventually went on to land coverage in publications like WP Tavern and WP Engine’s Torque, all of which are a result of us participating in, being, and hosting our own active community of agency owners.

The Future of the Atarim Facebook Group

We’ll no longer be using it as a support forum

Due to the early stage of the platform and us wanting to be wherever our users wanted us to be, we bent our own rules and started providing user support directly in the group. Although this is what users started doing because we let them, this doesn’t let us provide the seamless and fast support experience that we strive to provide for Atarim users. We have a dedicated support team that’s connected to our team of developers available via the live chat widget on our website which you’re welcome to use at any time.

In other words, as a part of our mission to improve the customer experience we want to make sure we’re using the right channels so all of your questions get to the right person faster and get answered even faster.

Weekly Demo Calls, Announcements, and Q&A

We are also proud to announce that we will now be doing weekly demo calls, as well as announcements and Q&A sessions in our Facebook group. This is to help everyone get to know the platform as well as get the help they need to implement it in their business successfully.

Everyone is welcome and we want you to bring all the questions you have about running your agency! Register below:

Summary – Why You Should Build A Brand Community

Looking inwards first, from our own community alone – we already have a few great members (of the ones we know of) that run their own amazing communities:

Looking for even more groups to join?

Here are 12 must-join Facebook groups for web designers.

Lead With A Strategy. Before you launch your community it’s important to center it around one main purpose. Ours, for example, has always been around serving our users and the demographic that Atarim caters to with various resources and discussions.

But, over the past few weeks – as is quite common for software companies that have their own Facebook groups, it slowly started to become more like a support forum which was never really the intention when we created the group. So it’s important to draw the line somewhere, have a code of conduct and guide people to the right places to get in touch when they need something.

Most people really don’t have bad intentions and as long as you’re doing a good job of communicating transparently, they’ll see why they’re being asked to email in about an issue as opposed to posting it publicly (for example, in this scenario – it’s easier to get all the necessary info and debug than if the whole conversations in a public forum).

The lesson in this is really that strategy isn’t a set & forget concept, once you have it – you need to continue guiding your community and members in the direction you want them to go in (noting that in some cases, if a statistical majority of members are leaning in a completely different direction which is also something that should be taken into consideration).

Your community’s goal shouldn’t be to win more business and build authority. While that is the by-product of the initiative as a whole being successful, the initial focus & motive should always be focused around the demographic that you’re targeting – who do you want in your group, and what do they want when they join all the way through to potentially making a purchase from you & then beyond after they’ve already been a customer for years. How do you cater to people at every single one of those stages of your community’s lifecycle?

Beyond that, here are some extra questions to ask yourself when planning the launch or future of your brand community:

  • What’s the purpose behind the community?
  • Are you trying to help people get answers to their questions about your product or cater to other areas of their business?
  • How are you going to keep the community members engaged especially in the early days when you’ll need to put in some more effort to fuel the growth?
  • What would define the success of your community?
  • Are you going to go as far as to track metrics like the leads you generate and the sales you make as a result of connections in your group?

Next is, be transparent.

Of the few successful group owners that have really created something of significant value, they’ve done so because they opened up and were transparent with their community. They didn’t try to act like they were something they weren’t, they were brutally honest and even share when they make mistakes in running their own web design businesses with their entire community.

And contrary to what you may think, this doesn’t hurt their ability to create authority – actually not in the least. What it does is that it builds trust and when you do share something positive people actually do believe what you have going on because you’ve been transparent with them the entire time.

And as long as you tie everything back to the original reason you’re creating the group and the problem you’re trying to solve, the gap you’re trying to fill – marketing your group and attracting members that are actually interested in participating becomes easier and easier.

So, do you already have or plan to start a community now? Let us know in the comments or in our community here! ?

Client Red Flags – What To Look Out for When Evaluating Potential Clients

Anyone who’s worked with a bad client knows how frustrating it is and how much of a negative impact it can have on your business – and to some extent, even your life.

Some freelancers and agency owners have shared that they’ve even gone through bouts of depression as a result of taking on certain clients. There comes a point in your professional journey where you’re going to be extremely protective of your time and your team’s resources – by choosing to work with businesses that align with your core vision.

So, in sales meetings there are red flags you can look out for that are typically indicative of a client that you wouldn’t want to take on…

No Interest In Your Process

The client has no interest in your process, either they don’t ask about it or are dismissive when you try to walk them through it on the initial call.

If a client starts trying to evade your process from day 1, how do you think it’s going to be like working with them a few months into the project?

As a general rule, if they do it once – you remind them of your process and if they purposely ignore the process again it’s time to start considering letting them go before they do any more damage to your business.

Belittling Your Effort and Involvement

The client is belittling your work, telling you what to do and how they want everything done. If they don’t believe in your ability then there’s a good chance that they’re not going to be accepting of any input from you when it comes time for them to share their feedback on drafts.

And unless that’s the type of client you’re deliberately looking for – this is a bad sign, to say the least. If something has gone wrong and changes need to happen at this point but the client doesn’t understand why – then expect resistance when you try presenting solutions.

They’ll likely always want things done “their way”.

The Client Tries To Run The Show

A client who is trying to run the show will have a sense of entitlement, thinking that they know the best way for things to be done because it’s their project. This person will also want you to do all sorts of tasks and spend hours on something that should take only minutes in order to prove how good they are at what you do. It can make your work life miserable if this kind of client has any say in your day-to-day operations or expectations since everything becomes more difficult when clients try to micromanage. The time and energy spent dealing with these people take away from your ability to focus on other truly important work.

Making Things Sound Easy

If a client is making things sound easy, they are either completely naive about what it takes to get work done or they’re trying to trick you into doing more, but pay less for it. It’s important to know when this happens so that you don’t inadvertently agree to the task and then find yourself overbooked with no time for anything else in your schedule. Clients need project management just like agencies do, but not every client will be able to provide input on how long tasks should take. When clients make their own under-estimations of how long something will take without having any experience in the field, think twice before agreeing; there tends to be a hidden motive to pay you as little as possible by making you feel like something is way easier than it actually is.

You know the process, you know the work. You set the price.

Not Taking Recommendations

Of course, people have the right to disagree with you.

But when it comes to the field you’re an expert in and they’re not – when they try to dictate what’s right and wrong. Run, run fast and run far. Because you can’t do your best to help them when all you get is resistance.

On initial calls with clients, I like to present some recommendations based on what I know about their business so far because that lets me gauge how they take feedback/suggestions from someone that’s been in the industry for years. If they can’t take it, or try to justify why things are a certain way – it tends to mean that they’re not aligned with our vision.

Remember – you’re being hired to solve their problems. You can’t do that if they don’t trust that your solutions and recommendations are the best.

They Try To Bargain For A Better Deal

If the client seems as if they’re offering a bargain, it’s best to stay away.

It’s understandable if they ask whether you’re flexible at all and whether there was anything they could change in the project scope to make it more affordable for the current stage of their company. But if they just ask for it to be less expensive without changing anything, this is typically an indication that they aren’t a good-fit client for your agency.

They’re used to talking their way into a less expensive service provider because they assume since we are newer or smaller in size than some other agencies, we should charge less. You don’t want clients who consider negotiating pricing upfront – those types of negotiations will likely happen over and over again as time goes on which means no matter what kind of relationship you build with them.

Not Good At What They Do

If a client is not good at what they do, doing your part (no matter how big or small) in helping them build their business is going to be a hundred times harder than it should be.

If upon meeting them you get the impression that they’re not the type of client that you would feel comfortable hiring if you would be in need of their services –they’re more than likely not the type of person you want to work with…

Summary – Working With Your Ideal Clients

These are just a few of the red flags and deal-breakers, we’ve seen in our time running an agency and our users share with us.

Over the years, I’ve learned that not taking these & ignoring them is going only going to hurt me in the long run. While the quick money is nice, it isn’t going to help you build a business you love working on when you have clients that don’t fit that business.

Atarim 2.0 – Our Biggest Update Yet

The past month has been absolutely crazy here at Atarim. As we transitioned from a WordPress plugin to a full blown SaaS (see why we changed our name in our previous post here), we also reflected this in our platform.

In the past 18 months, this has been the biggest update we’ve ever done and it’s something we are very proud of.

This was definitely the hardest project of my entire professional life and having a (super cute) newborn didn’t make it easier! My team and I were working 18 hour days for almost the entire month to get this to fruition and I am extremely proud of them, the result and what we are now able to offer to all of you and to our industry. As with every big update, please make sure you perform the update in a safe environment first.

See the full list below (video coming soon):

Agency Dashboard

New Features

  • Complete redesign of the UI
    • Under the new name, Atarim, we also redesigned the Agency Dashboard, with a new color scheme, more minimal look and feel and repositioned, well, everything.
  • All data is now hosted on our server
    • We have implemented cloud based hosting for the Agency Dashboard, meaning that ALL new tasks, comments & tasks that are created on your client’s websites will be hosted on our side, getting rid of any bloat and increasing speed.
  • Email Notifications are now handled by us
    • No need to install SMTP plugins to make sure emails are sending from a website, all notifications will be handled by us ensuring they get delivered.
  • Improved Speed
    • As we scale we have more resources available on our server, to ensure an even faster experiencing jumping between different tasks and pages.
  • Automatic Image Optimization –
    • All images that are uploaded on the website side are optimized for web automatically, meaning you don’t need to save for web in Photoshop or use TinyPNG anymore.
  • New sidebar 
    • We added a platform wide new sidebar, for easy navigation, and to allow us to keep expanding beyond the limited space that the header navigation provided.
  • KPIs & Agency Benchmarks screen
    • Introducing a new screen to allow our users to run a data-driven business. The screen includes:
      • First Response Time – That checks the average time from when a task was created until the first comment OR when a task was marked as complete. From the past 7 days.
        It also shows a trend compared to the previous week so you can improve the result.
      • Task Completion Time – Checks the average time between the task was created and the time it was marked as complete.
        It also shows a trend compared to the previous week so you can improve the result.
      • Pending Urgent Tasks – Showing the number of tasks across all websites that are marked as urgent and still open.
        It also shows a trend compared to the previous week so you can improve the result.
      • Total Completed Tasks – This shows you the total number of tasks you have completed since you joined.
        It also shows a benchmark compared to other agencies that are part of the Atarim ecosystem so you can compare your agency to others in the industry
      • Weekly Number Of Tasks – Shows the weekly number of tasks created in last 12 weeks that have been created.
        This will demonstrate the growth of your business’ productivity across all websites.
      • Websites With Most Time Tracked – Shows the top 5 websites that have the most time tracked inside your Agency Dashboard.
        Giving you an overview of how much time has been spent on tasks for each website by you and your team.
      • Tasks Completed This Week VS Last Week – Shows you how many tasks have been completed each day of the current week VS last week.
        To show you the productivity of your agency as you continue to work on client projects and provide support to your care plans.
      • Time Tracked by Users In Past 30 Days – A list of users on your Agency Dashboard and the amount of time they’ve tracked in the last month.
        Get an overview of how your team are working in terms of time when it comes to their tasks, letting you know who is getting the work done!
      • Full Team Activity – See a full breakdown of what users inside your Agency Dashboard have been up to, whether they have commented on a task or change the status/urgency.
        Always be in the know of what is happening within your Agency, ensuring you never miss a beat.
    • Task Center (The Agency Inbox)
      • Activity Notices
        If the status or urgency of a task is changed, a notice will appear in the chat showing you what was changed, who changed it and when.
        Follow a task from beginning to end and see exactly what was done.
      • Assigning Users – You can now assign a user to a task with a drop down and keep accountability in check.
        Give ultimate responsibility on tasks by assigning your team members, letting them know it’s there’s to complete.
      • Auto Screenshot In Right Bar – The auto-screenshot is now in the right bar of the Task Center instead of being a tab that you switched out for the task chat.
        Making it super easy to just click the screenshot and see it in a lightbox, so you don’t have to move away from the task itself.
      • Color Coded Stickers – Stickers are now color-coded based on task status and urgency.
        Making it super clear what the current state of a task is before you even open it.
      • Images Inside Tasks – Before when an image was uploaded to a task, you would not see this on the Agency Dashboard, it is now added.
        Ensuring you can see everything that is inside a task.
    • Boards
      • Every covered in the Task Center and...
      • Task Slide-In – Before, when clicking a task in the boards, it would pop-up in the center of a screen. It is now a much nicer slide-in.
        Now you are not taken out of the action when viewing tasks on the boards section, making it way easier to open and close tasks as you’re working.
    • Global Settings
      • New Color Picker – A heavily improved color picker for white label settings.
      • Matched With Client Interface – Previously settings screens were different between the Agency Dashboard and Client Interface Plugin, they are not identical.
      • Improved White Label – You can now change the favicon on the widget on websites, giving you full white label options to impress your clients.

Client Interface Plugin

New Features

  • All data is now hosted on our server
    • We have implemented cloud based hosting for the Agency Dashboard, meaning that ALL new tasks, comments & tasks that are created on your client’s websites will be hosted on our side, getting rid of any bloat and increasing speed.
  • Changed The Name –  Instead of just calling it a plugin, it is now called the Atarim Client Interface Plugin. This is to make it clear that the Agency Dashboard is for the Agency and the website is for the client.
  • Complete redesign of the UI 
    • Under the new name, we also redesigned the Client Interface Plugin entirely, with a new color scheme, new icons, new stickers and well…everything (same as Agency Dashboard)
    • New Bottom Bar 
      • A completely new bar at the bottom of the website.
        We have now split the sidebar features such as filters & reports into the bottom bar. allowing a more visual experience for less savvy clients.
      • The sidebar now only shows tasks.
        With a much cleaner design, the sidebar is way easier use.
      • Tasks in the sidebar are shown based on date.
        Tasks are split into lists based on when they were made, so you can see which ones were made today, yesterday or in the past week – giving even more clarity.
      • Color coded stickers on sidebar
        Previously color coded stickers only showed on the front-end, now it’s much more uniform by having them color-coded on the sidebar too.
      • Progress bar to visually show you tasks on each page
        On top of the bottom bar sits a colored bar, red shows you how many open tasks, orange shows in progress & green shows completed. Giving you a visual representation of the state of each page you visit that has tasks.
      • You can now white label the icon on the widget
        The favicon on the widget can now be switched, giving you full white label options to impress your clients.
      • Main color toned down throughout Client Interface Plugin
        Previously if a bright color was chosen in white label settings, it could look super wacky. This color has been toned down and only put it a few places, giving the option of white labelling without it being too much.
      • Approve page button on bottom bar
        Pages can now be approved by clicking a button in the bottom left of the bottom bar – be careful though, once it’s approved…it’s approved (can’t undo).
      • Number of tasks per page
        See how many tasks on a page in the bottom right, giving you quick info on how many have been created.
      • Quick access to Agency Dashboard
        You can now quickly access the Agency Dashboard by clicking a link in the bottom bar, this is only shown to Web Masters.
      • One Line Instruction
        Now when entering comment mode, a clear message is shown instructing your clients what to do, giving them all the help they need to get started.
  • Stickers
    • You can delete file uploads inside tasks
      Deleting files that have been uploaded to tasks is now super easy with just one click.
    • Auto optimization on images
      All images that are uploaded are automatically optimized for web, no more saving for web in Photoshop or using TinyPNG.
    • Share link improved 
      Before you had to refresh to see the share link of a task, it is now created in real time with the task, stopping the need to refresh (we’re all about saving time!)
    • Activity notices now appear inside tasks
      Whenever someone changes the urgency or status of a task, an activity notice will appear in the chat showing what was changed, who changed it and when, letting you see the entire journey of a task.
    • Mark as complete checkbox on pop-up
      You can now complete tasks with a checkbox on task pop-ups, making it super efficient when a task has been finished.
    • White border on stickers
      A white border was added on stickers on the front-end to make them pop-out of the page
    • Comment mode highlight
      While in comment mode, selecting elements will now not only have a red border but also a flashing shadow, making it clear what is being chosen.
    • Improved cursor behavior in comment mode
      In comment and remapping mode, hovering over elements is a much smoother experience now, ensuring there is no confusion over what you’re highlighting.
    • Mobile optimization
      We have improved the position of pop-up on mobile, it now shows on the bottom statically, as opposed to popping out, making it much more user friendly.
  • Graphic FeedBack
    • Everything already covered in Client Interface Plugin and…
    • Image preview when creating a new graphic file & a new version of a graphic 
      See a preview of the image you are uploading to make sure you’ve chosen the correct image for your graphic items.
    • Top bar redesigned
      The top bar has been minified to make it much cleaner when using the Graphic FeedBack tool.
    • Increased size of the image 
      The size of graphics has been increased, making it easier to see what you’re looking at.
    • Sidebar has been made wider
      Before it could be difficult to look at a bunch of tasks in the sidebar, now it’s much cleaner with a wider background.
  • Task Center
    • Activity Notices
      If the status or urgency of a task is changed, a notice will appear in the chat showing you what was changed, who changed it and when.
      Follow a task from beginning to end and see exactly what was done.
    • Color Coded Stickers
      Previously color coded stickers only showed on the front-end, now it’s uniform by showing them inside the Task Center too.
    • Auto screen has been moved
      The auto-screenshot is now in the right bar of the Task Center instead of being a tab that you switched out for the task chat.
      Making it super easy to just click the screenshot and see it in a lightbox, so you don’t have to move away from the task itself.
  • Settings & Permissions
    • Complete redesign
      Screens have been completely redesigned, making it a much cleaner experience when toggling settings and permissions.
    • Favicon upload
      You can now replace the favicon on our widget with your own, truly giving a full white label option.
    • New Color Picker
      A new color picker to make it much easier for you to choose the color you want to white label the Client Interface Plugin to.

Introducing Atarim: Our 18-Month Journey from WP FeedBack to Today

When WP FeedBack launched 18 months ago, our own agency’s internal needs led to the initial release of a simple visual feedback tool that we wanted to use with clients.

It goes without saying, we’ve come a long way from day 1.

As we were gaining massive traction, user results and feedback began pouring in, we kept expanding our basic WordPress plugin and quickly became the leading solution for website feedback within the WordPress community.

From listening to our users and getting deeper into the problem we were solving (collaborating seamlessly inside WordPress websites), I felt that we needed to give you, our users, a more granular view of your workflow and the feedback you were gathering from a growing number of your clients and websites.

The first method, before the Agency Dashboard, was pushing all the requests to your email inbox. That worked for a bit but was counterproductive to our initial vision of getting you out of the mess that managing clients at scale via email creates.

I also found that the headaches we were all experiencing with our clients had a broader problem that, with our initial recognition and focus, we were perfectly positioned to tackle…

That’s when our cloud-based PRO Dashboard (now evolved into the Agency Dashboard) was introduced – as a simple and intuitive way for managing all the requests that were coming in.

This is also when we officially evolved from being a plugin company to a cloud-based application (or a SaaS) with a plugin.

Kind of like Intercom or Zendesk or Hubspot each has WordPress plugins to integrate into their cloud-based application.

It goes without saying, we’ve come a long way from day 1.

WP FeedBack Transitions To A Fully-Fledged Platform

WordPress powers close to 40% of the entire internet now and even at the time of our launch, having some experience building WordPress plugins through my agency, it was the logical first step to develop a plugin that helps agencies (including us) that rely on WordPress as their content management system of choice.

Solving the problem for this specific, yet still sizable subset of the web design industry was a huge feat, and we’re proud to have come so far from the initial launch of our plugin to where we are today.

Although the Agency Dashboard was added to our roadmap just a couple of months after the initial launch, we hadn’t realized just how much of a difference it would make.

The amount of time it saves & the flexibility we have when developing compared to developing within the confines of a WordPress plugin were unimaginable. The plugin (or “The Atarim Client Interface Plugin” as we now call it) became just the client interface to make their life a lot easier when providing you with the content you need for the build, the feedback on your designs and the ongoing requests that come as part of your Care Plan services – The agencies that were seeing the most substantial results stopped working from the plugin and started working from the dashboard.

Ourselves (and customers included) all had a realization that now that this was possible, this is the way to use our platform which since launch has transitioned from a plugin to a full, cloud-based solution for client collaboration, team management, project delivery and ongoing support.

Introducing Atarim – The Logical Next Step

As the product and vision for WP FeedBack evolved, so has the brand’s needs.

We’re no longer just a plugin nor we were no longer just a feedback tool.

Though the name suggested that we are exactly that:

The “WP” in WP FeedBack suggested we’re a plugin and the word “FeedBack” suggested that we’re, well, a feedback tool!

To position ourselves for these recent changes & all of our upcoming plans, we’re excited to announce that we’re also rebranding to Atarim.

Why Atarim? Great question!

The literal meaning of “Atarim” is “Websites” in Hebrew, my native language.

I was never a huge fan of vague names that only a handful of people know the meaning of the word, I was more of a literal name kind of guy.

But now, going through this journey over the past couple of years, I can see the appeal.

A literal name (Like WP FeedBack) signals to people what you are straight out of the gate, but it’s limiting if the vision expands beyond it’s initial scope.

Also, for our existing and potential users, I want them to see us as a much broader solution than what our initial competitors and the companies we were compared to have to offer. They now have nothing on us! ?

It’s a great place to start as I’m certain that it helped up get the traction we experienced early on by lighting a light bulb in the minds of our potential users as soon as they heard the name – “Nice! a feedback tool for WordPress!”.

But now, and with the upcoming additions to the platform, we need that “generic and vague” term that will be associated with the company – I found that with these kinds of brands, the company makes the name and not the other way around. I feel that we have enough influence and power to take this step and make this happen.

What’s Next?

Going forward, we’ve rebuilt our website from scratch. As you can tell, the current (WP FeedBack) website no longer truly conveys what Atarim is and what it’s capable of.

This comes together with version 2.0 of our product that takes things to new heights with a cleaner UI based on what we learned over time, a whole bunch of new features like our Agency KPIs screen, team activity feeds and a few more products that you can now cancel as they are built into our platform – such as storage apps like Dropbox, project management tools like Trello, time tracking tools and image optimizations for web tools.

And this is just the start!

You will see more and more tools being removed from your extremely fragmented workflow that our industry has forced us into since there was never a platform that was designed specifically for the needs of web agencies and freelancers. That is until now ??

This year, we also started running weekly sessions with our users (as well as others interested) to showcase the power of Atarim and to help educate the WordPress community and our industry for better practices for managing projects, clients and teams when running and growing a web design & development business.

When I was teaching guitar in my early 20’s I used to say to my students: You can buy the best guitar in the world (or in our case the best tools) but if you don’t put in the work to learn and implement, it’s worthless!

Interested in joining us? Learn more & register here…

Our aim is to continue building fast and release v3.0 of Atarim by the end of the year & we have a whole range of incredible and super innovative features planned for our Agency Dashboard and our Client Interface Plugin – with the goal of continuing to empower the industry and community that changed my life and completely eliminate the time we spend being “slaves to the grind”.

Welcome to Atarim – The first and only client-facing web agency management platform designed to speed up your work, client collaboration, and team management.

How To Gather Website Content (The Right Way)

If you ask any web agency or freelancer: “have you ever found gathering content from your clients easy?”.

How many do you think say yes…?

We asked just this to 100 agencies and freelancers for our recent coaching session around gathering content and the results were interesting (which we will go into later).

It confirmed even further for us that gathering content is THE biggest bottleneck in your project delivery.

In this post we are going to show you how this bottleneck impacts your business as a whole, why it exists and how to completely eliminate it using Atarim.

The Impact

It might seem like an exaggeration when we say that is is THE biggest bottleneck in your business, but it really is.

If you only had yourself to rely on when building a new website, from start to finish, I guarantee you it would take you a few days (or even a day if you are super speedy).

This is obviously the best case scenario when working with clients, and ones that can achieve this with you are basically unicorns ?.

The image above demonstrates what we are trying to say here…The gathering content part of a website project usually happens throughout the entire project (see the red line ? )

Meaning that whenever you are waiting on your client for that next bit of the content, the other process in your project delivery suffer tremendously. What does this mean for your business:

  • Your profitability suffers because your project delivery time is WAY higher than it should be.
  • You become angry or discontent with your clients, when in reality it isn’t their fault (curating content is hard).
  • Projects get backed up and you are stuck waiting for revenue to come in for months or even sometimes years.
  • Your relationships with your clients are soured, not only effecting your current project but potentially stopping you from being recommended to new clients.

The main takeaway from the impact bottlenecks cause is that in reality, it’s not your client’s fault. We know some clients can be difficult but in reality, the responsibility is with your agency, to make the job of sending the content easy and as painless as possible for your clients.

Why This Bottleneck Exists

We’ve found that 9 times out of 10, as soon as a project starts (including the discovery phase), designers will request content from their client. This is already a mistake as you are at the absolute mercy of your client.

Even if you introduce your client to a platform or Google Doc; whatever you might be using, receiving the content takes a lifetime. Why does this happen?

Curating content is hard…

A standard Google Sheet content template

Put yourself in your client’s shoes. They’ve found an agency or freelancer to design and develop their new website for their business, and after paying their deposit they receive a template like the above.

We aren’t blaming you by any means, we’ve been in this situation many times ourselves designing websites for over two decades.

Your client is lost and confused about how to send you the content you need to carry on with the project, hence the 50+ email chain you’ve managed to build up over a few weeks trying to squeeze it out of them like blood from a stone.

While we can easily see how the content is going to fit with your client’s website, they aren’t a web designer. They struggle to see that the main title of the page needs to be 5-6 words while the opening about section needs a lengthy paragraph.

This is why the content you’re receiving is never what you need the first go around, wasting everyone’s time.

So how do we avoid this from happening?

Using Atarim

Wirefaming & Prototyping Correctly

Gather content when you wireframe/prototype

We’ve tried and tested this, and so have our users on over 15,000 websites that have used Atarim: request content AFTER you’ve built your wireframes and prototypes!

How you should gather this content we will go into in a minute.

Let’s start with prototyping: we strongly recommend a plugin called Slick Sitemap. It is no longer support but it’s a tiny plugin that just works.
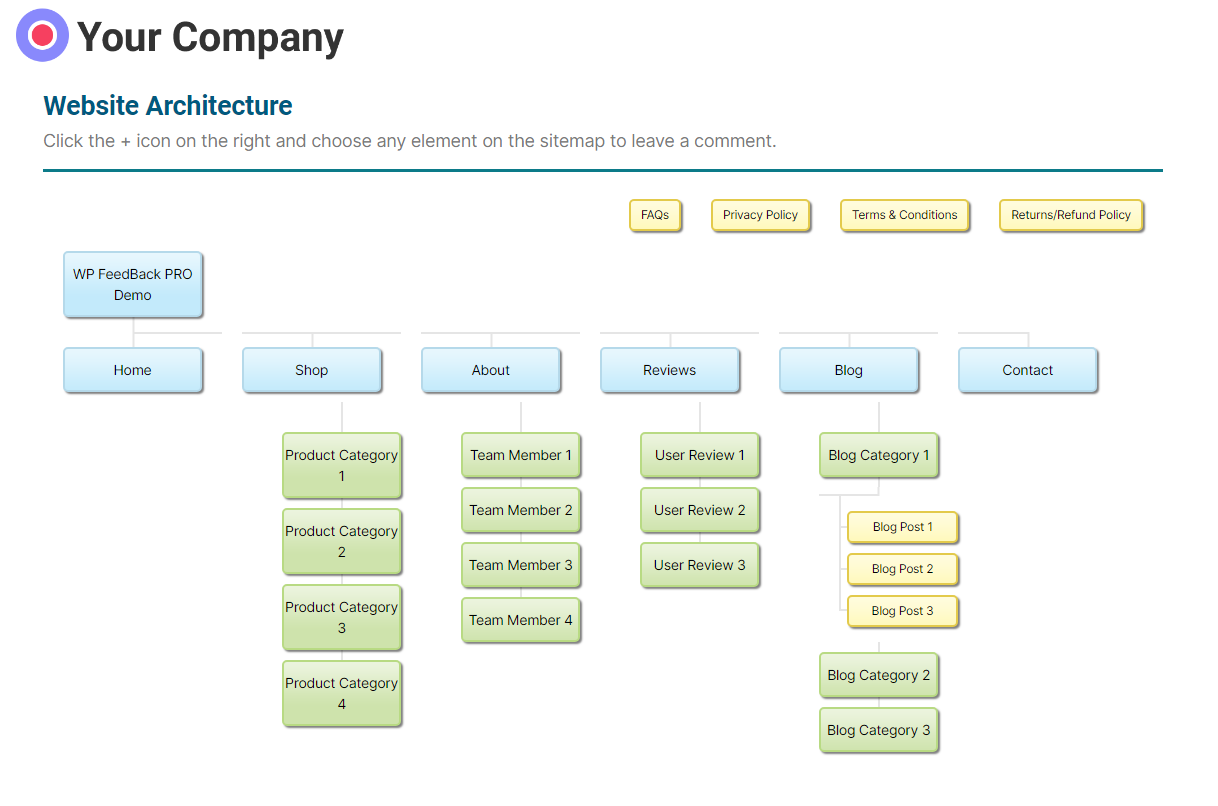
A sitemap made with Slick Sitemap

This allows you to create a sitemap using the WordPress menu. Simply make the menu and then add a simple shortcode to the page.
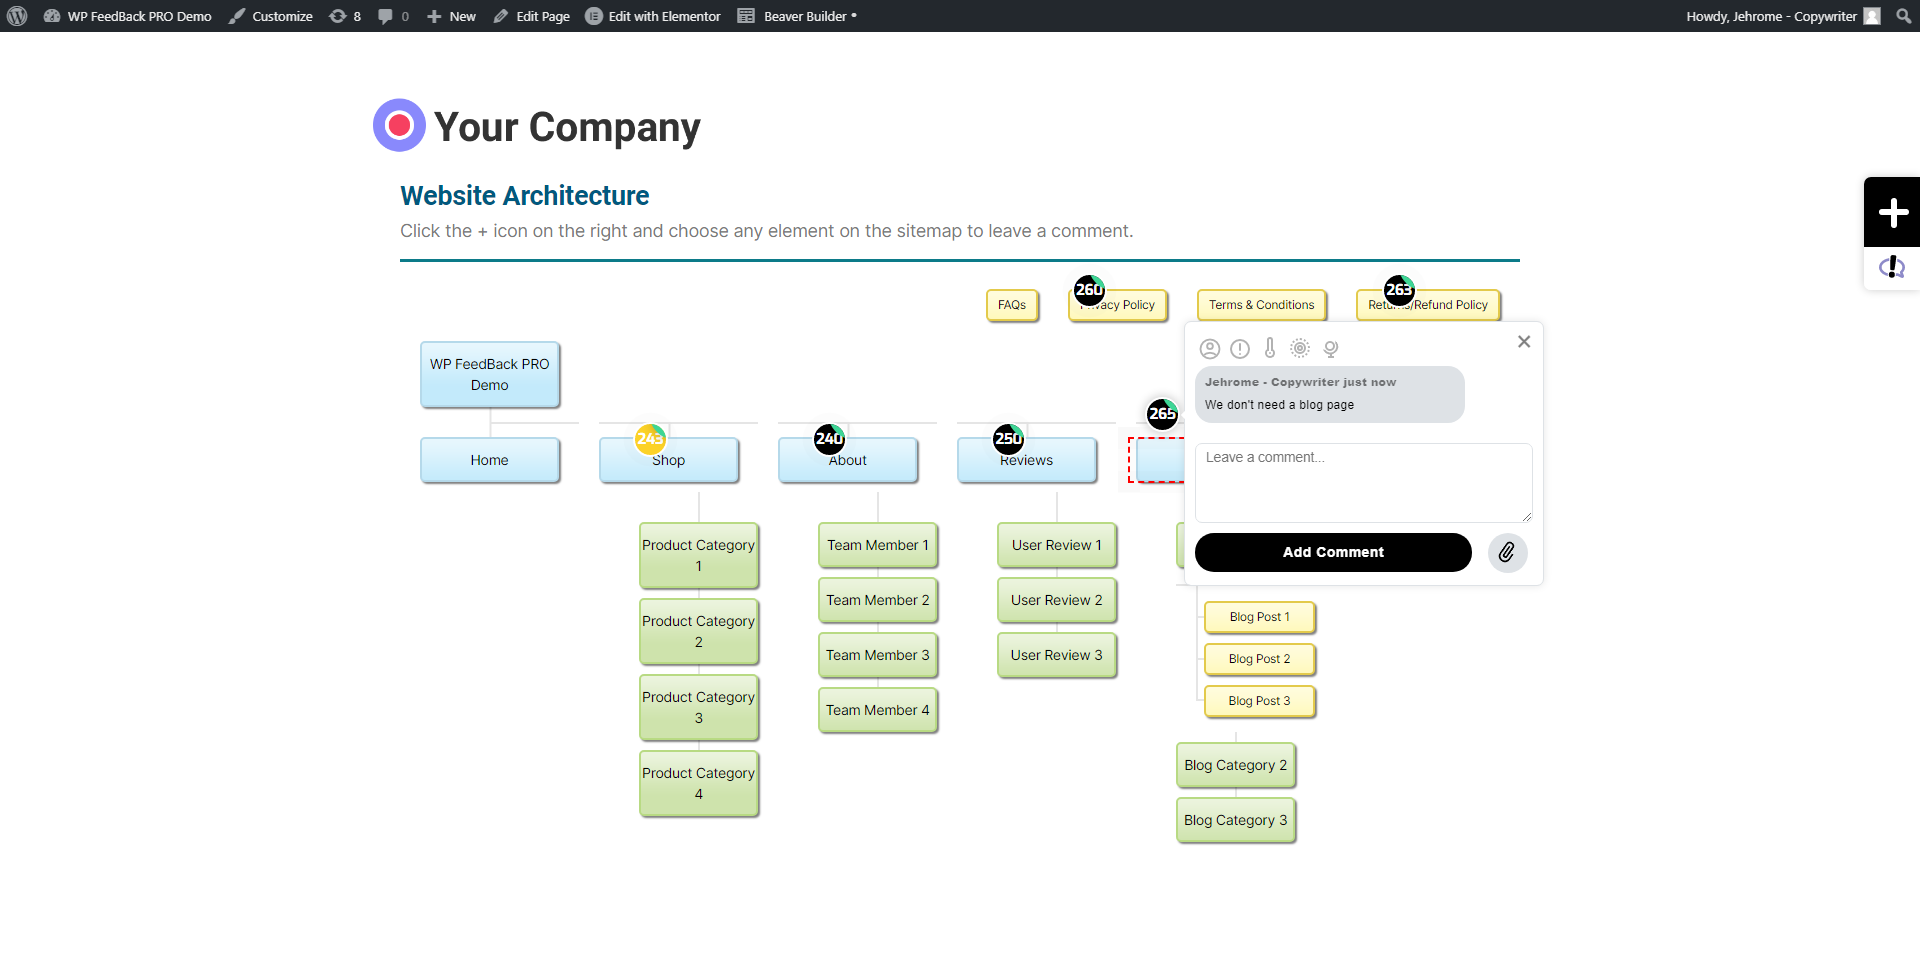
The shortcode you need to add is: [slick-sitemap]

I guarantee you sending this to your client will make deciding the layout of the website super easy and efficient. They can visually see all of the pages their website is going to contain and once this is agreed, you’ve successfully set your client’s expectations for how their website is going to structured.

Now it’s time to introduce Atarim onto the website and get your client involved. Here is a handy swipe file that we’ve written for you to send to your client to get them to look at the wireframe and leave you feedback using the platform (download swipe file).

A client’s feedback on a sitemap

Your client can tell you exactly what they want on specific points on the wireframe like in the image above, making it easy and efficient for you both to get to the finalized wireframe.

The Prototyping Stage

Once you’ve the wireframe/sitemap and your client has agreed, you’re ready to start create prototype pages; this is where the magic happens when gathering content.

With Atarim we provide prototyping templates for all of the most popular page builders including: Elementor, Beaver Builder, DIVI and Gutenberg.

The 3 options for header and hero section of the templates

These templates have 3 different options for each section of a standard homepage (and the entire website really), all you need to do is delete the sections you don’t want and keep the one that want.

These all have placeholder content so you don’t need to do anything else. Once you have created all of the prototype pages, it’s time to use Atarim to gather the content from your client.

First, send your client this video:

We made this video to introduce your client on how to use Atarim in the best way possible. In this example, we are talking about approving designs (which is the next step), but it’s exactly the same process as gathering the content.

And this is the beauty of our platform, once your client learns how to use Atarim, they are ready to collaborate with you at every stage of the project.

If you prefer, inside the swipe file in the second section we have another email you can send to request your client to begin giving you the content through Atarim.

Gathering The Content

In the gif above is a small example of how your client can give you content on the hero section, it’s so easy. Not only that, instead of your client looking at a spreadsheet or Word document, they can visually see how the content is going to be laid out.

This will show your client the length of text you need for each section, hopefully resulting in you receiving the content in the correct format the first time; saving you and them a huge chunk of time.

Stop using massive email chains where content and context gets lost. Atarim keeps everything organized for you, where you will always have the tasks to refer back to find the content and insert it into the website.

At the same time, your client will more than likely give you feedback about the layout, hitting two birds with one stone. Once your client is done going through the website, hopefully you have all of the content you need.

Our Gathering Content Coaching Session

On the 13th of January, we had our first coaching session which was around gathering content! It was awesome and our users who joined learned a bunch.

To sign up, users had to answer a couple of questions about how they are gathering content and the results were interesting:

  • 74% said it’s hard to gather content
  • 86% use more than 1 tool to gather content
  • 75% that use ONLY Atarim to gather content said it’s easy

Can you see the correlation here? ?

When using only one platform to gather content, it becomes so much easier especially when that one platform is Atarim ?

To Wrap Up

We have developed and designed Atarim to be THE way to gather content when delivering website projects. Not only that, it’s designed in a way that can be used at every stage of a project from start to finish.

Not ONLY that, the app dashboard also has the functionality so you can handle 100+ projects at the same time no matter which stage they are currently at.

This results in:

  • You getting paid sooner as your projects move along smoothly
  • You build a great relationship with your clients because it’s easy to train them to use and they can use it throughout the entire project.
  • You can do this at scale with every single project and grow your agency at a rapid rate, the only thing that’s stopping you is you.

Coaching sessions will be happening weekly, for us to help you grow your agency using Atarim.

Sign up for the next on here